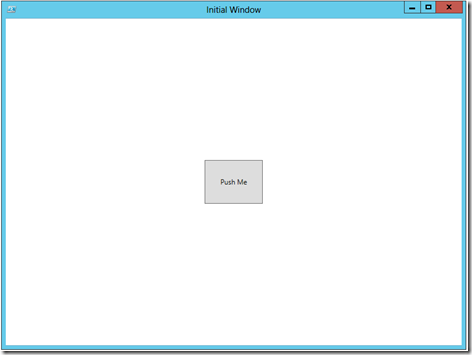
In my second installment of working with PowerShell and WPF, I will touch on the subject of Buttons. They can be a pretty important part of your UI and should be treated as such. Ok, so buttons seem pretty simple; you either click a button or you don’t click a button. And that is pretty much it. I will cover a couple of cases of using a button and handling the button click as well as handling a couple of other events that really work with any other control.
First thing is first, lets set up the button with XAML and show the initial UI:
[xml]$xaml = @"
<Window
    xmlns="http://schemas.microsoft.com/winfx/2006/xaml/presentation"
    xmlns:x="http://schemas.microsoft.com/winfx/2006/xaml"
    x:Name="Window" Title="Initial Window" WindowStartupLocation = "CenterScreen"
    Width = "800" Height = "600" ShowInTaskbar = "True">
    <Button x:Name = "Button" Height = "75" Width = "100" Content = 'Push Me' ToolTip = "This is a button" />
</Window>
"@

$reader=(New-Object System.Xml.XmlNodeReader $xaml)
$Window=[Windows.Markup.XamlReader]::Load( $reader )

#Connect to Control
$button = $Window.FindName("Button")

$Window.ShowDialog() | Out-Null
Not exactly mind blowing, but this is the button in the Window. So you may be wondering why the button is in the dead center of the Window. Well, this is because I haven’t used any other layouts within the Window such as a canvas or grid. I cannot add another button either because only 1 child control can exist directly under the window itself. This is why you would use another layout underneath such as a grid or canvas because then you could add multiple controls to that instead. With that, my next article will be about Canvases. ![]()
Moving on, now that we do have our button, we can look at doing some customizations with the button to make it look more appealing to the user.
Some useful approaches to design
Background Color
Setting the background color and help bring that button out in a form.
$button.Background = "Green"
Adjusting the text on the button
With the different colors, you may have to adjust your text color as well as adding other things to the text to make it work in the button.
$button.Foreground = "White"
$button.FontSize = "12"
$button.FontWeight = "Bold"
Putting an Image on the Button
For something fun and different, you could add an image on the button instead of the usual text or background color. There is a little more work involved, but it is worth it. For this, I will show both the PowerShell\.Net and XAML implementation.
PowerShell\.Net
#Add Image to Button
$image = New-Object System.Windows.Controls.Image
$image.Source = "C:\users\Administrator\Desktop\Avengers.jpg"
$image.Stretch = 'Fill'
$button.Content = $image
XAML
[xml]$xaml = @"
<Window
    xmlns="http://schemas.microsoft.com/winfx/2006/xaml/presentation"
    xmlns:x="http://schemas.microsoft.com/winfx/2006/xaml"
    x:Name="Window" Title="Initial Window" WindowStartupLocation = "CenterScreen"
    Width = "800" Height = "600" ShowInTaskbar = "True">
    <Button x:Name = "Button" Height = "75" Width = "100" ToolTip = "This is a button">
        <Image Source = "C:\users\Administrator\Desktop\Avengers.jpg" Stretch = "Fill"/>
    </Button>
</Window>
"@

$reader=(New-Object System.Xml.XmlNodeReader $xaml)
$Window=[Windows.Markup.XamlReader]::Load( $reader )

#Connect to Control
$button = $Window.FindName("Button")

$Window.ShowDialog() | Out-Null
The end result will be the same for the button:
Some events to work with
Besides the obligatory Click event, there are a couple of other events I will show that can also be used with other controls if you choose to do so.
Clicking the button
You knew it was coming and here it is, the click event for the button! For this, I chose to randomly change the background color of the window with each click.
#On click, change window background color
$button.Add_Click({
    $Window.Background = (Get-Random -InputObject "Black","Red","Green","White","Blue","Yellow","Cyan")
})
Lets do a couple of clicks of the button…
You get the idea…
When the mouse cursor enters and leaves the control
This is a fun way of changing the mouse cursor (or do something else for that matter) when the cursor enters and leaves the specified control, in this case, the button. Basically we assign the event to the control and specify whatever actions we want to happen when the mouse enters the control.
#Make the mouse act like something is happening
$button.Add_MouseEnter({
    $Window.Cursor = [System.Windows.Input.Cursors]::Hand
})
#Switch back to regular mouse
$button.Add_MouseLeave({
    $Window.Cursor = [System.Windows.Input.Cursors]::Arrow
})
Because the mouse cursor will not show up on print screen or snipping tool, here is what you would see of the cursor when it goes into the button:
And once the mouse leaves the button:
Summary
In closing, there really wasn’t a lot for the button to work with. It gets clicked or it doesn’t get clicked. But you can add some cool things to the button to make it something other than a typical button. As always, these are some of the things that I would look to use for the button, but if you have a question or wanted to know something more, just let me know and I will update/answer the question here!


anyone please give me the code for the mouse click on set coordinates through powershell
Hi,
I am trying to use the basic setup as you described here in combination with more detailed stylesheet information, but that does not work.
Would you have some pointers how I can use the xml reader part in combination with stylesheets?
Many thanks!
Arjan
I love your blog!
-When the button get the focus, it switch from $button.Background color to Foreground color at a heart beat rate… I’m new to XAML and Power Shell, is this a normal behavior?
-More seriously, would it be possible to simulate a “click” on this button from an other Runspace using technics learned in the previous example?
You rock!
Pingback: PowerShell And WPF: Canvas | Learn Powershell | Achieve More